
This post may contain affiliate links. For more information, see our privacy policy.
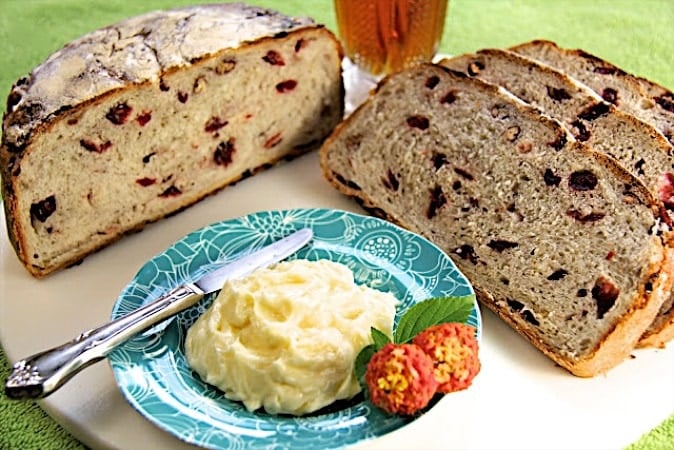
Does this sound holiday-ish or what?! Would you suffer through the Thanksgiving leftovers if you could have turkey sandwiches or paninis on this delicious bread? How about a simple breakfast for guests with toasted Cranberry Pecan Artisan Bread and fresh fruit? Or a fabulous Christmas morning brunch, starring Cranberry Pecan Artisan French Toast! Guess what? You can have all of these this holiday season and whatever else your imagination leads you to do, with this fabulous bread. Why? Because the initial prep time is literally 5 minutes! You think I'm kidding, right? Well, I hate to tell you this, but you're wrong...... you have to try this!
Here's how it works. Throw all the ingredients into a large bowl/container (if you have a history of yeast-phobia, no worries, no proofing here!), mix it up with a sturdy spoon, cover and let it rise. The next step, again, takes about 5 minutes; take a clump of dough out of the bowl, lay it on a floured surface, fold it over a few times and let it sit on a floured towel while the yeast does it's magic and the dough swells to double. The last step happens in the oven, while you mosey around, doing whatever it is that you like to do (maybe it's checking out cooking blogs!) with the most unbelievably heavenly aromas wafting though your home!

P.S. Okay, okay, I admit, I was wrong: it doesn't take 5 minutes to make this bread, it takes 10, with the dough shaping included, sorry!
Oh, and you think you have "monkey business" going on at your house?
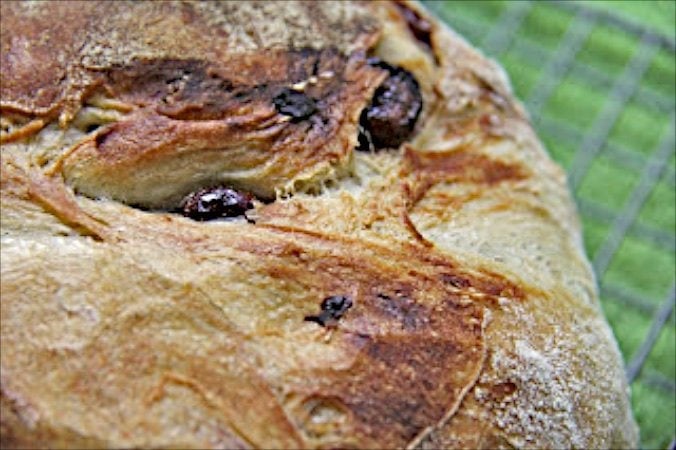
Well, look who I found in my kitchen! Isn't he cute? (I honestly had no idea he was there, until I was editing the pictures my husband Scott had taken - there he was!)
Scroll Down for the Recipe - or Save It to Your Inbox
We’ll email you the recipe so it’s easy to save, print, or share.

Cranberry Pecan Five Minute Artisan Bread
Ingredients
- 2-¾ cups lukewarm water
- 1-½ tablespoon granulated yeast
- 1 ¼ tablespoons sea salt, if you don't have sea salt or kosher salt, use regular salt but only use 1 tablespoon
- ¼ cup sugar
- ¼ cup extra virgin olive oil
- 6-½ cups unbleached all-purpose flour
- ½ cup chopped toasted pecans
- 1 cup dried cranberries
Instructions
- Mix the yeast, salt, sugar, and olive oil with the water in a 5-quart bowl, or a lidded (not airtight) food container. Stir to combine and add the dried cranberries and pecans.
- Mix in the flour without kneading. I used this fun whisk (thanks again Annie - I love it!) but a sturdy wooden or metal spoon would be fine. This is when you have to get out a bit of elbow grease - the dough will be quite thick and shaggy. Just mix until all the flour has been incorporated.
- Cover (not airtight), and allow to rest at room temperature until dough rises and colapses (or flattens on top), 1- 2 hours, depending on how warm your kitchen is and what kind of mood the yeast is in.
- Sprinkle your counter liberally with flour. Take out half of the dough (or a quarter of the dough if you want smaller loaves) and place in on the flour covered counter. Place the rest of the dough in the refrigerator - it will keep for 4-5 days or until whenever your ready to make your next loaf! Using a bowl scraper or rubber spatula, scrape the dough into a mound on top of the floured surface. Turn it over to coat the entire ball of dough with flour - this will help it lose some of it's stickiness. Using floured hands or a bowl scraper, lift the outside edges toward the center, working around the entire piece to make a smooth round ball.
- Lay a thin cotton or linen tea towel (not terry cloth, which tends to stick) or a large cloth napkin on your work surface. Generously sprinkle the surface of the towel with flour. Using your hands or scraper, gently lift the dough on to the prepared towel and place seam side down. Dust the top of the dough with more flour. Cover the dough with the sides of the towel and place in a warm, draft-free spot to rise, about 1 hour or until almost doubled in size.
- About a half an hour before the end of the second rise, place a rack in the lower third of the oven and preheat to 475º F and place a 3-4-quart heavy pot or cast iron dutch oven with a tight fitting lid in the center of the rack (mine holds exactly 3 quarts and is 6 inches wide by 33/4 inches tall. If you are making a small loaf with just a quarter of the dough, use a smaller pot).
- When the dough is ready to bake, carefully remove the HOT dutch oven from the oven using oven mitts; remove the lid. Unfold the towel, gently slide your hand under the dough and gently invert the dough into the hot pot. (I like to do this step over my kitchen sink - any excess flour will fall into the sink and it's easier for me to do this step with my pot lowered into the sink a bit.) If any dough clings to the top or sides unevenly, quickly run an off-set spatula or knife around the edges to even. The dough will eventually even itself out while baking.
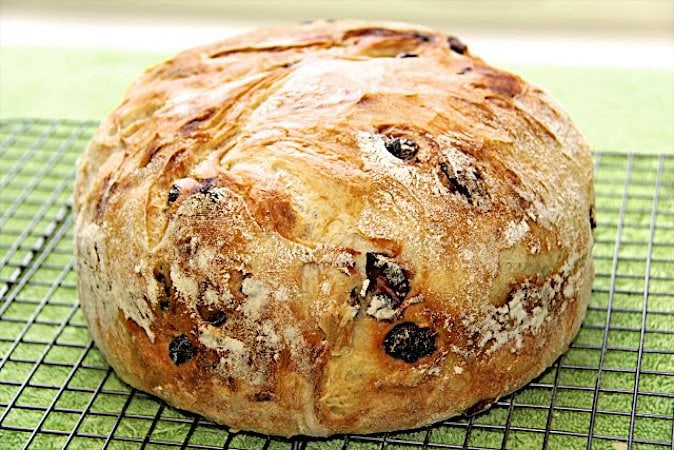
- Using oven mitts, place the hot lid back on the pot and return to the oven. Bake for 20-25 minutes. Using oven mitts, remove the hot lid and continue baking until the bread is a deep, golden brown, about 15-20 minutes more. Remove from the oven. Invert the pan to release the bread or use a thin handle of a spatula to carefully lift the bread out of the pot and place it on a rack to cool completely before slicing, about 2 hours.
Notes
Shop Our Café Loves
We’ve gathered our favorite kitchen tools, tableware, and entertaining treasures in one place, the Café Loves store. It’s a wonderful spot to find something special for yourself or the cooks and hosts you love!


I'm disabled and this recipe is something I can make . I'm making it tomorrow and I'm so excited! I made an apple pie today.
That's great, Katheryn! Enjoy!
Hi Chris — wondering what the impact would be on this bread if you use bread flour or part bread flour? Thanks!
You can definitely use bread flour for this recipe!
Could you use rapid rise yeast?
Hi Debbie, you can use rapid rise yeast for this recipe. The rising time will be a little bit less but it works!
I’d love to make this, but I don’t have a cast iron pot or Dutch oven. Would this bread work in a cake tin?
Hi Mandi. this bread needs to be baked in a container with a cover. Do you have any saucepans with covers? If you do, you could divide the dough into smaller portions.
I just purchased a small Dutch oven and almost returned it, now I don’t have to!!
I like the idea of a smaller loaf, there is just the two of us. If I skipped the cranberries, nuts and just used Trader Joe’s Everything but the Bagel seasoning, what other changes should I make...I.e. sugar? I want to be able to adapt the recipe to serve with soup, etc. make it savory rather than sweet.
Hi Claudia, I think you could make the recipe as directed with the bagel seasoning. This recipe would also be wonderful with soup: https://thecafesucrefarine.com/ridiculously-easy-rosemary-bread/
This sounds wonderful! I’m going to try it for first day of school breakfast.
Awesome! Enjoy!
I have a 6 quart cast iron dutch oven. Is that too big?
Hi Cyndi, you can use that but your bread will be flatter, more like a ciabatta. It will still be wonderful though!
Do you grease the container you put the bread in to bake it? It doesn’t say anywhere if you do or not. Don't have a small Dutch oven so will try a ceramic bowl with lid
No, you don't have to grease the pan.
Hi! Would it be possible to make this recipe with fresh cranberries instead? What alterations should I make?
I think you could although the bread may end up a little soggy. I would probably add some sugar too as fresh cranberries are so tart.
I’m making this dough right now. I’m at the stage where I put the other half in the fridge while the first half rises again. My question is, how do I prepare the fridge dough when ready to bake? Does it need to come to room temp and/or rise again? Thanks!
Hi Brandy, yes bring the dough up to room temp and start the process over with step 5. Enjoy!
I've made this bread twice now, and both times when I inverted it into the hot Dutch oven, the rise completely collapsed. I ended up with a lumpy, but relatively thin loaf of bread. How do you get it into the pot without it completely deflating? Or is it supposed to collapse? Despite the deflating, it tastes great, which is why I am motivated to keep trying. I used half whole wheat flour and half all-purpose.
Hi Elizabeth, the only thing I can think of his the whole wheat flour. Sometimes you have to add vital gluten when using whole wheat flour for bread so it's not too heavy.
I have a 5.5 qt dutch oven. Should I use all of the dough? If not, how should I divide it?
Yes, you could definitely use all of the dough. Your loaf will be a little more squat.
I baked the first loaf yesterday - it was awesome! Going to bake the remaining as little buns/rolls - not sure of the temp as 475 will be too high. any ideas? I was thinking 425 maybe? Thanks!
I think 400 or 425 should work great. So happy you enjoyed the bread!
Haven't made this Bread yet but I'm definitely looking forward to making it. I've made Artisan Breads a couple of times but this one looks absolutely delicious. I'll post after I make it. One question, you say to use a 3 qt Dutch Oven which I do have. I was just wondering how much of the dough do you put in the size Dutch oven. Half of the dough?
Thanks, Mary Lou
Hi Mary Lou, yes I use half of the total amount of dough.
I made this Cranberry Pecan Bread Recipe and it's fantastic. So very delicious. I gave a Loaf to my Daughter and she also loved it. I let the dough rise for 1 1/2 hours and it was perfect. It was so easy to handle not that I had to but I like to. Haha. My Bread looks just like yours with the face 🙂 I'm very Proud thanks to you. My loaf is already gone time to make another one.
Thanks so very much for sharing this Recipe with all of us.
Mary Lou
That's awesome Mary Lou! And I love that you got a face too!
This bread is so delicious I am making a second batch in less than a week. The first two loaves were gobbled up quickly! I used 1 cup of sourdough starter, so omitted the yeast and decreased the flour and water by 1/2 cup each, but otherwise followed the recipe exactly. My wild yeast had a longer rise time, but it was worth the wait. Thank you for sharing this delectable recipe!
Thanks Jennine, love your sourdough version!
Hello, I don't have a dutch oven, what other way can I make this bread? thank you
Hi Aneta, you could just use a large pot.
Delicious! I made it all by myself (I'm no baker)!and it was delicious!
I'm so glad you enjoyed it Casey!
How long would you bake if making 4 loaves?
This looks fantastic! I bought the book based on your recommendation, but haven't had a chance to try it yet - I'll let you know when I do!
Do you think you could have planned that illusion? I am really loving the 5/10 minute breads, this one is super rustic, fantastic job!
Chris-
What a yummy and seasonal spin on the basic recipe! The dutch oven/cast iron pot really does make for a wonderful crust. Did you hear your bread sing?!
What a beautiful loaf of bread! I have resolved to be more adventuresome with yeast dough and this recipe looks like one I could manage. Yeast always intimidates me but the thought of toasted slices of cranberry pecan bread slathered with butter is enough to get me through the ordeal. The dutch oven produces a wonderful crust. Thanks for the inspiration.
That's a handsome loaf of bread! I like the idea of baking it in a cast iron pot as it lends such a beautiful shape to the loaf.
Thank you so much for visiting and following my blog. Glad to follow you back. Enjoyed reading your Meet Chris page 🙂 It is wonderful to meet you!
Wow, this bread is so beautiful!
Ooh how delicious. I've never baked bread in a dutch oven before. I'll have to give it a go.